
If you own a Dyson humidifier, then you are already enjoying a pleasing atmosphere in your home, ain’t ya? But, do you know that, like all machines, a humidifier needs cleaning too?
Yes, after 7 to 8 days of usage, a humidifier must be cleaned to operate properly. So, as an owner of a Dyson humidifier, you must be thinking “how to clean Dyson humidifiers?”. Well, that’s why we are over here to quench your thirst for knowledge.
We will show you the detailed steps of cleaning a Dyson humidifier. Moreover, in this very discussion, we will let you in on many other related questions regarding cleaning a Dyson humidifier as well.
So, if you give a thorough read throughout this discussion, we can guarantee that it will be a valuable investment of your time. Without any more chit-chat, let’s get straight into the main topic.
What’s The Point Of Cleaning My Dyson Humidifier?
Cleaning your humidifier is tremendously important because of a few reasons. Let’s discuss them below:

Ensuring Proper Functioning Of Your Device
If you want your humidifier to provide you with efficient performance, you must keep your humidifier clean. Similar to any other appliance, if you don’t conduct proper maintenance on a humidifier, it won’t last for as long as you would expect it to.
So, if you want to get the most satisfying service for the money you paid, you need to keep cleaning your Dyson humidifier.
Health Concerns:
Not cleaning your humidifier for a long time can bring a whole world of troubles to the health of your household people. Since it’s a device that operates with the flow of water, some accumulation of bacteria and mold is inevitable over time.
Therefore, if you don’t disinfect and clean the humidifier on a routine basis, slowly but surely, the bacteria will spread to the home atmosphere. As a result, many diseases will start creeping in.
On the other hand, if you conduct a thorough cleanup of your Dyson humidifier, you won’t have to worry about airborne diseases at all. In fact, a soothing atmosphere provided by the Dyson humidifier will boost your immune system to fight off diseases.
Prevention Against Common Diseases:
For people who are suffering from asthma, severe cough, lung inflammation, loss of appetite, shortness of breath, high-grade fevers, etc., soothing air can be a primary solution.
So, if you have patients in your house with respiratory problems, you must clean your Dyson humidifier in due time.
Instead of suffering from these chronic diseases, you can just take a few minutes to clean your humidifier and, in the process, save your lungs.
13 Simple Steps For Cleaning Out Your Dyson Humidifier
Before you attempt to clean your Dyson humidifier, you need to understand that cleaning a humidifier involves completely opening it up and doing a thorough clean-up from the inside out.
So, for a successful cleanup, you need to be mentally prepared for the whole disassembly process.
Needed Items:
- Freshwater
- White vinegar (distilled) or, citric acid
Here we go,,,
1. Disconnecting Power:
In the cleaning process of the Dyson humidifier, the first step to take is to disconnect power and turn OFF the machine. Mind it, having the electricity turned ON while disassembling the device is extremely dangerous.
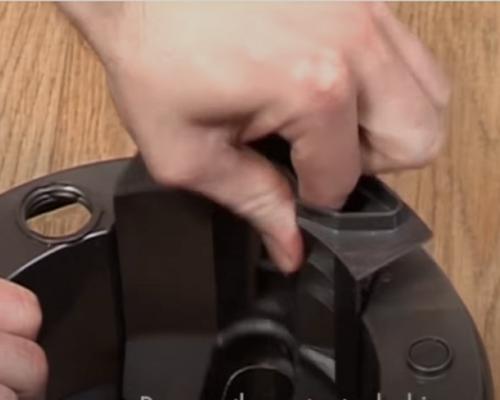
2. Uninstalling The Amp Piece:
Push the white button in the water tank, and uninstall the amp piece from the humidifier.
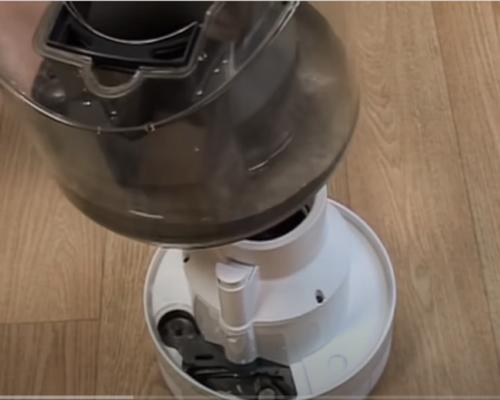
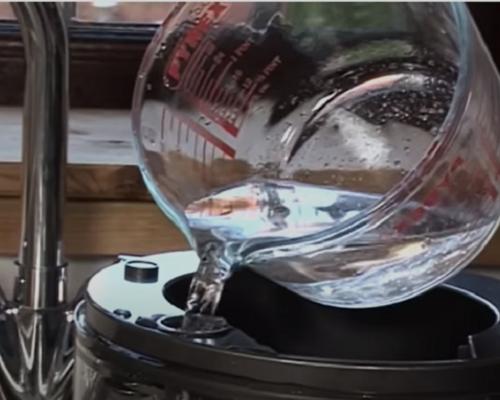
3. Uninstalling The Tank:
The next step in cleaning your humidifier is to uninstall your tank. After safely removing the tank, you need to wipe it clean with a dry piece of fabric.
Then, your job is to uninstall the plugs from the water tank of the humidifier. And then, you need to drain all the water and make it completely empty.
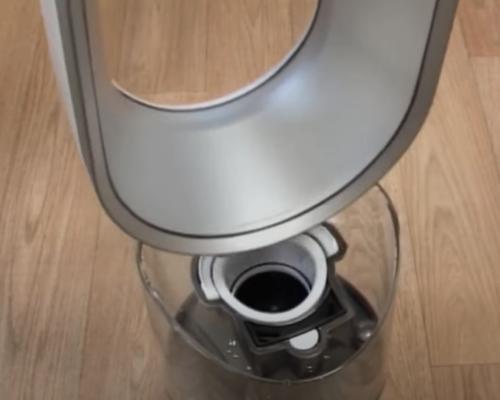
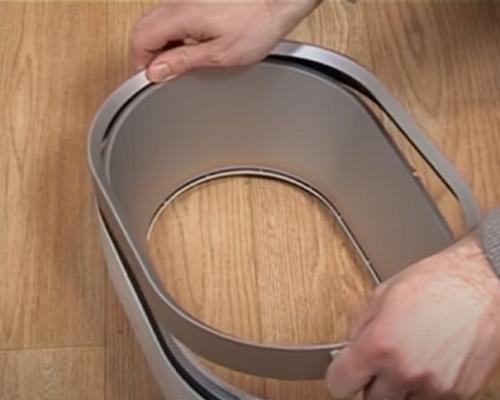
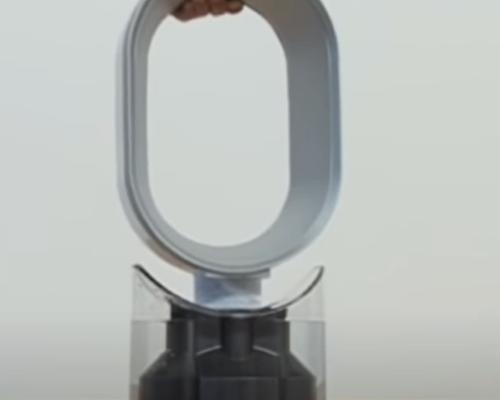
4. Disengaging The Chimney:
The fourth step in the cleaning process is to remove the chimney from your humidifier. In order to do that, you need to loosen the chimney first.
You will find a dial that tightens the chimney to the humidifier structure. Now, rotate the dial in a clockwise direction to loosen the chimney. Then, disengage the seal that is holding the chimney. Finally, lift the chimney out of the humidifier.
5. Draining The Trough:
At this point, you’ll notice that there is some water accumulated in the trough. So, you need to hold the trough upside down and drain out all the water that it’s containing.

6. Preparing The Cleaning Solution:
Now, it’s time to prepare the cleaning solution for your humidifier. In order to brew an efficient cleaning solution, mix 30g of citric acid in 1L of water.

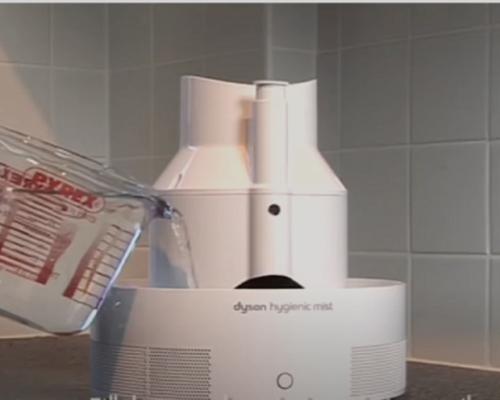
7. Pour The Solution Into The Trough:
In this step, you will pour the cleaning solution into the trough. You have to fully fill the trough with the cleaning solution and let the solution sit there for about half an hour.
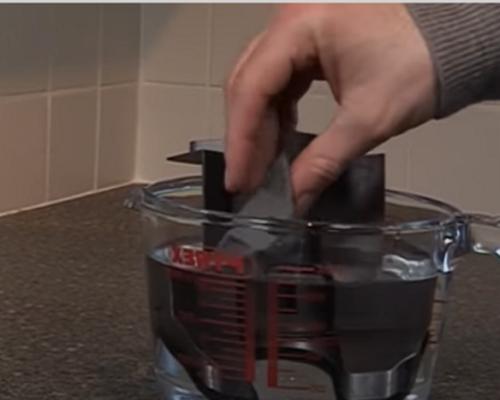
8. Submerging The Components In The Solution:
At this point, pour some cleaning solution in a medium-sized bowl, and submerge the chimney, the seal, and the trough seal in the cleaning solution. And, let them stay submerged for 30 minutes.
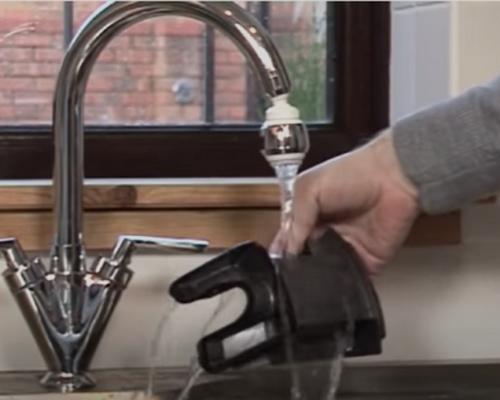
9. Rinsing Each Part With Water (And Drying Them):
After the 30-minute wait time is over, you need to grab each part that you have disassembled and rinse them in the clean water one by one.
After the parts are totally cleaned by freshwater, you also need to wipe them with a dry piece of fabric and ensure that they’re fully dry.
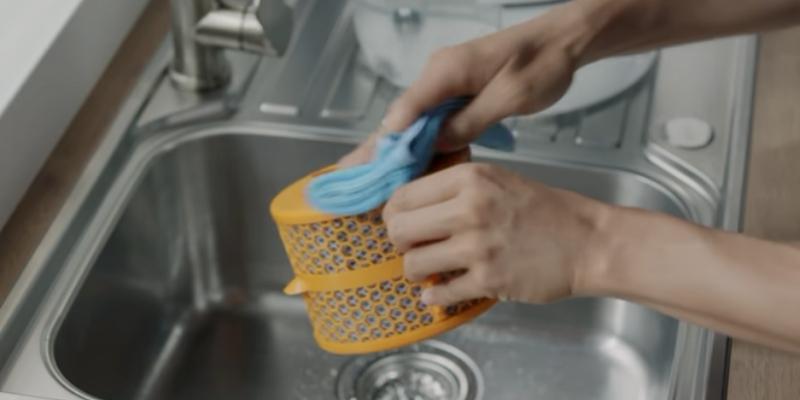
10. Cleaning The Amp Assembly:
Now, it’s time to take apart the Amp assembly from its frame. Then, you can wipe it clean with a fabric that is drenched with the solution.

11. Pouring The Solution Into The Tank:
At this point, you need to pour the remaining solutions into the tank of the humidifier. And then, you have to seal the tank. After making sure the sealing is done, shake the tank with your hand so that solution reaches every corner of space inside the tank.
12. Draining The Tank:
After you have cleaned the tank by pouring the cleaning solution into it, you need to drain the solution. To do that, hold the tank upside down and let the water drain out.
Also, after draining out the water, you need to pour some freshwater into the tank and shake it again. And then, drain the water again (to make sure you have no citric acid remaining in the tank).

13. Reassembling The Humidifier:
At this point, all the parts of your humidifier are fully cleaned. Now, all you have to do is reassemble them in the same order as you have disassembled them.
Useful Tips For Regular Maintenance Of The Dyson Humidifier
In order for you to glean the best service from your Dyson humidifier, we have put together a list of tips that you can take advantage of. Check them out:
Doing Weekly Cleanup:
You should always maintain a habit of cleaning your humidifier every week. In the cleaning process, we recommend that you follow the cleaning guide we have provided above.
Completely Draining The Old Water:
Before you refill the humidifier every day, it is recommended to fully drain out the humidifier. This means getting the old water out of the humidifier tank. Although the old water from one day ago will not create a major problem, just to be on the safe side, it is good to change the water on a daily basis.
Using Demineralized And Distilled Water:
Using tap water in the humidifier will leave it fully dirty in 3 to 4 days of usage. That’s why we wholeheartedly recommend that you use filtered and distilled water in the humidifier.
Furthermore, we endorse the use of demineralized water in the humidifier as well. It’s because, over the time of usage, the minerals of the water get accumulated in the humidifier. Consequently, you have to spend more time cleaning the humidifier.
Drain And Dry Before Storage:
If it’s summer, and you no longer have to use the humidifier for a few months, you should always fully drain out the humidifier before storing it. Also, before storing the humidifier, you’ll have to ensure that the humidifier components are fully dried as well.
Frequently Asked Questions
Can I Use Vinegar To Clean My Dyson Humidifier?
Yes, it’s perfectly fine to use white vinegar as an alternative to citric acid.
Is It Okay To Use Tap Water To Clean Dyson Humidifiers?
Although it’s recommended to use distilled and demineralized water in the cleaning process, it is usually okay to use tap water as well. But, we recommend that you filter the tap water before using it.
Should I Use Hot Water In Cleaning The Dyson Humidifier?
No, absolutely not. There is no need whatsoever to use boiling hot water in the process of cleaning the Dyson humidifier. Water with Normal temperature should be perfectly fine for the cleaning process.
Bottom Line
Finally, we have to say that the humidifier can be an effective tool in making your atmosphere a pleasing one. Also, it can turn out to be a tool to ruin your home atmosphere as well (depending on how you use it). That’s why it’s important that you take the cleaning job very seriously.
Anyway, now that as you have gotten an idea of how to clean Dyson humidifiers, you should have no problem maintaining a healthy atmosphere in your home. So, we hope that you have the best time with your humidifier. Peace out!!!