Dehumidifiers are great for keeping away from mold growth and dust allergies, alongside keeping the air free from bad odors. However, you must clean it once in a while in order to keep dehumidifying efficiently with good airflow.
Cleaning the parts that don’t need tools to access is pretty straightforward, but what about the coil inside? How to clean dehumidifier coils deeply without damaging the machine?
Well, you’ll open up the back and front part of the machine, access the coils inside, and wash it thoroughly. Let’s dig deep and see how you can do it all by yourself with DIY process, without hiring a professional.
How Often Should Clean Your Dehumidifier Coils?
It’s a common concern how often you have to clean the dehumidifier in the first place. And since you have to take the machine apart and get your hands into the internals, frequent disassembly can harm its integrity.
Therefore, you don’t necessarily have to deep clean the coils of your dehumidifier every month or so. You can clean the lesser complicated parts of it every month, and you should, for optimal output. But when it comes to deep cleaning, you can do it twice a year, or maybe 3, maximum.
Depending on the humidity level you have in your house and your area, you can tweak the number. Higher humidity with higher dust and impurities will translate into a higher demand for cleaning the dehumidifier.
What You’ll Need To Clean Dehumidifier Coils
Disassembling the dehumidifier and cleaning it deep into the coil requires some tools and cleaning items. Apart from that, you must have an understanding of how the dehumidifier is made, how it works, and its parts. Here are the things you’ll need to clean the dehumidifier from start to finish:
First off, get a dust mask and a pair of rubber gloves to save your hands and respiratory from dust invasion. Then, for the cleaning part, get a coil cleaning foam alongside detergent and soapy water. This cleaning agent works great, especially for loosening heavy grime inside a dehumidifier for garage.
Take some cleaning rugs, a stiff cleaning wire brushes as well as a vacuum cleaner or a strong air blower. Not to mention, a set of screwdrivers and a pry tool for a proper disassembly of the machine. Also have an air conditioner fin comb in case you accidentally end up bending the fins on the evaporator coils.
How To Clean Dehumidifier Coils
Cleaning the dehumidifier won’t be very difficult if you know how the machine has been assembled. If you’ve never even seen the internals of a dehumidifier before, no worries, we’ll talk about how to clean dehumidifier coils.
Preparation and Safety
An electric dehumidifier works with direct current, and you must disconnect before getting inside. Unplug the machine from the socket and put it where you have no problem if it gets dirty. You can also take it outside the house and start repairing the machine.
Another great safety step would be taking pictures or videos at every stage of the job. In case you forget a step of disassembling the machine, the photos and videos will help you reassemble it. You can also go for a repair manual if the humidifier manufacturer has included any in the user manual.
Disassemble the outer part
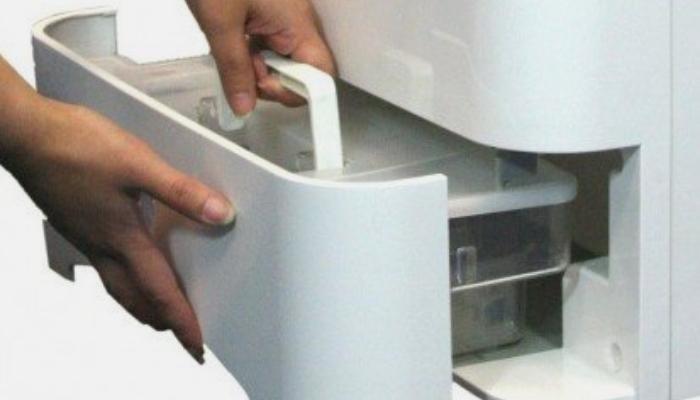
Start by cleaning the dehumidifier from the outside if there is any loose dust on the body. Now, take the dehumidifier tank out of the dehumidifier alongside the outer primary air filter. Take a screwdriver, and unscrew the whole back part of the dehumidifier, as well as the front potion.
Cleaning the filters

Don’t forget to wash the pre-filter as well as the inside of the water collection tank as they get dirty. Some dehumidifiers come with two filters before you get to the coil itself for cleaner circulation. Clean every dehumidifier filter and both the covers with a damp cloth dipped into mild soap and clean water for loose dirt.
Expose the fan and clean

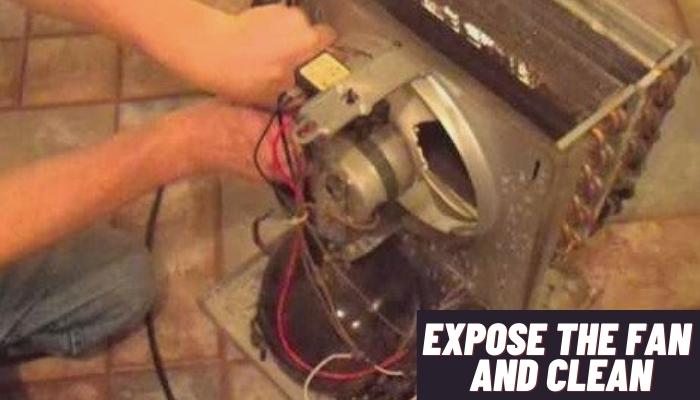
Once you’ve successfully taken the covers and the air filter out, the suction fan will appear in front, fixed with screws. Unscrew the fan and dry-clean it before applying a cleaning solution if you want to. You can use dish soap or liquid soap for both the fan motor and the fan blade with stubborn dirt. After getting the fan off, the only left components will be the coil, condenser, and PCBs.
Deep cleaning the coils

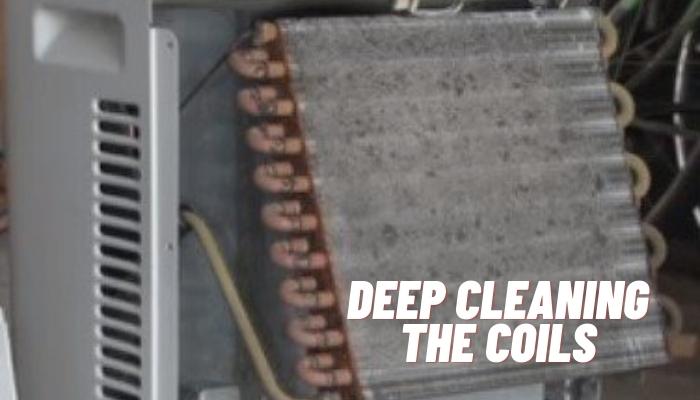
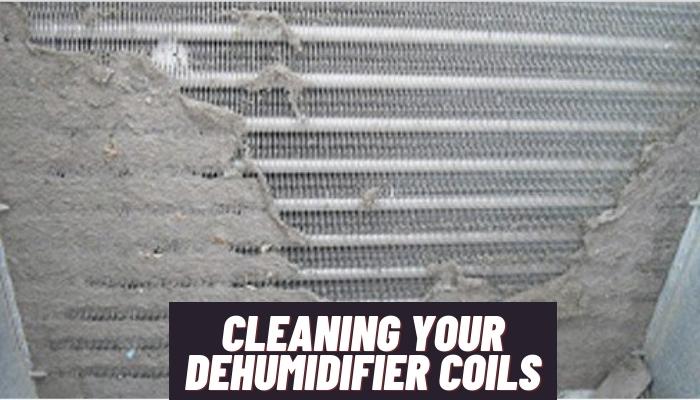
Now that you have the coils all along, clean the excess and loose dust, grime, and dirt before going deep. Remember to stroke your stiff brush on the coils parallel to the tines so that they don’t bend over. Spray cleaning foam into the coils and let sit for a while before treating them with a soft brush attachment.
The foam will disappear after a while, then it’s time to wash them thoroughly. Keeping them on a side, pour warm water all over, apply detergent powder on the coils, and scrub brush them well. Leave the coil for 10-20 minutes dipped under lukewarm water and let the stiff grimes get off. You can use household cleaner items like white vinegar solution here to dip the cold coils with water.
Dry everything inside
Take the clean coil out of the water and use an air blower to rinse the excess water. You can also use a hair dryer to dry the internal parts of the dehumidifier that are wet. Leave them like that, and don’t put the machine back together until every part of it is completely dry. Dry even the water reservoir, and that’s pretty much how to clean condenser coils on dehumidifier!
Assemble the dehumidifier

After the internal parts of the dehumidifier, including the coils, are spotless and dry, it’s time to put the machine together. The easiest way to assemble the machine is reversing the disassembly process, step by step. You can take reference help from the manual if you have one, or the photos you took while disassembling.
Benefits Of Cleaning Your Dehumidifier Coils

Your dehumidifier uses the coil to condense the excess moisture or humidity in the air. Therefore, it comes into contact with fine dust and allergies a lot. Therefore, you must know how to clean coils on dehumidifier and clean them to help the machine work efficiently. Here are a few of the benefits of cleaning your dehumidifier coils once in every while:
- It will help the dehumidifier absorb more humid air or moisture from your room and ambient atmosphere.
- Cleaning the coils will increase the life span of the machine, as the condenser and cooler unit will work efficiently.
- You’re keeping the machine away from cluttering with excessive germs and debris to keep both the machine and the air healthy.
- If you have the coil clean, it won’t matter if you have too much humidity in the air, as the machine will work without any hiccups.
- You can forecast the drainage time when you have the coils clean and working without failing or over-dehumidifying.
- Overheating, showing error codes, irritating noise and other minor issues won’t be there when you clean your dehumidifier regularly.
- Mold and mildew will grow faster in a dirty dehumidifier coil compared to a clean one, where you’re safe if you clean it regularly.
Conclusion
Now that you know how to clean dehumidifier coils, it’s time to remind you of some crucial safety precautions. First of which will be keeping the electric line off and disconnected from the dehumidifier and cleaning after it cools off. Secondly, don’t brush the coils against the lines, that might bend them to stop working at all.
And lastly, don’t put the machine back together until it’s completely dry because you’re going to connect electricity to it. If you leave water and moisture inside the machine, it might catch on fire or break on you. Don’t forget to record your steps while disassembling the machine for future reference when you put it back together.
